
 Here is a step by step guide to install LAMP (Linux, Apache, MySQL, PHP) on Ubuntu 10.04 LTS “Lucid Lynx”. When you finished installing LAMP you have the basic applications installed to run a website from your own computer. All you have to do is download Drupal, Joomla or Worpress and place them in your var/www folder on your system and run the installation setup that comes with the website you want to use.
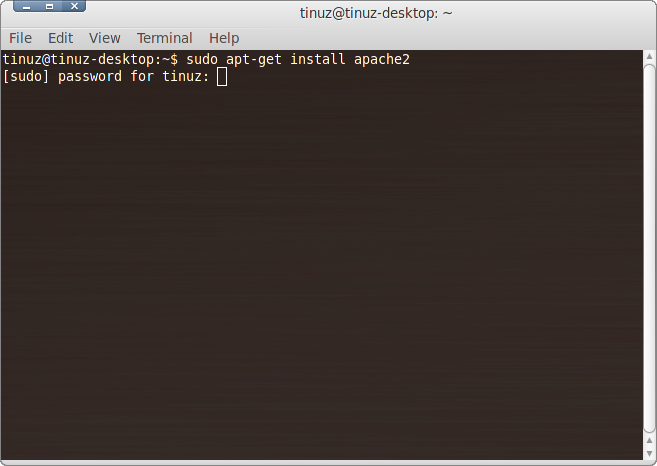
First we will install Apache, to do this open a Terminal window (Applications -> Accessories -> Terminal) and copy+paste the following line:
sudo apt-get install apache2
The Terminal will then ask you for you’re password, type it and then press enter.
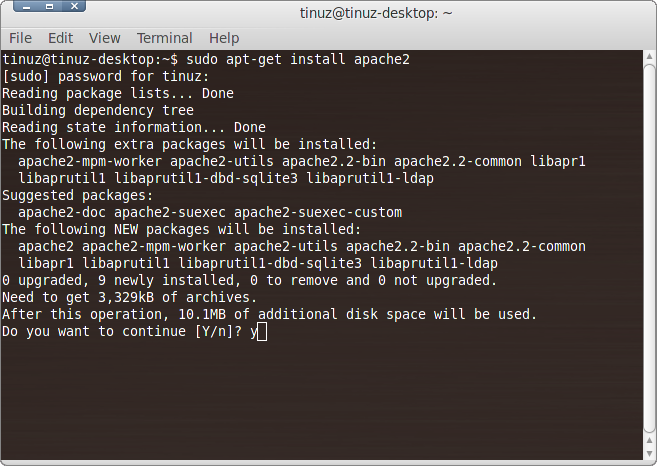
Press y key and press Enter
To make sure everything is installed correctly we will now test Apache to ensure it’s working properly. Open your web browser and then copy+paste the following into the web address:
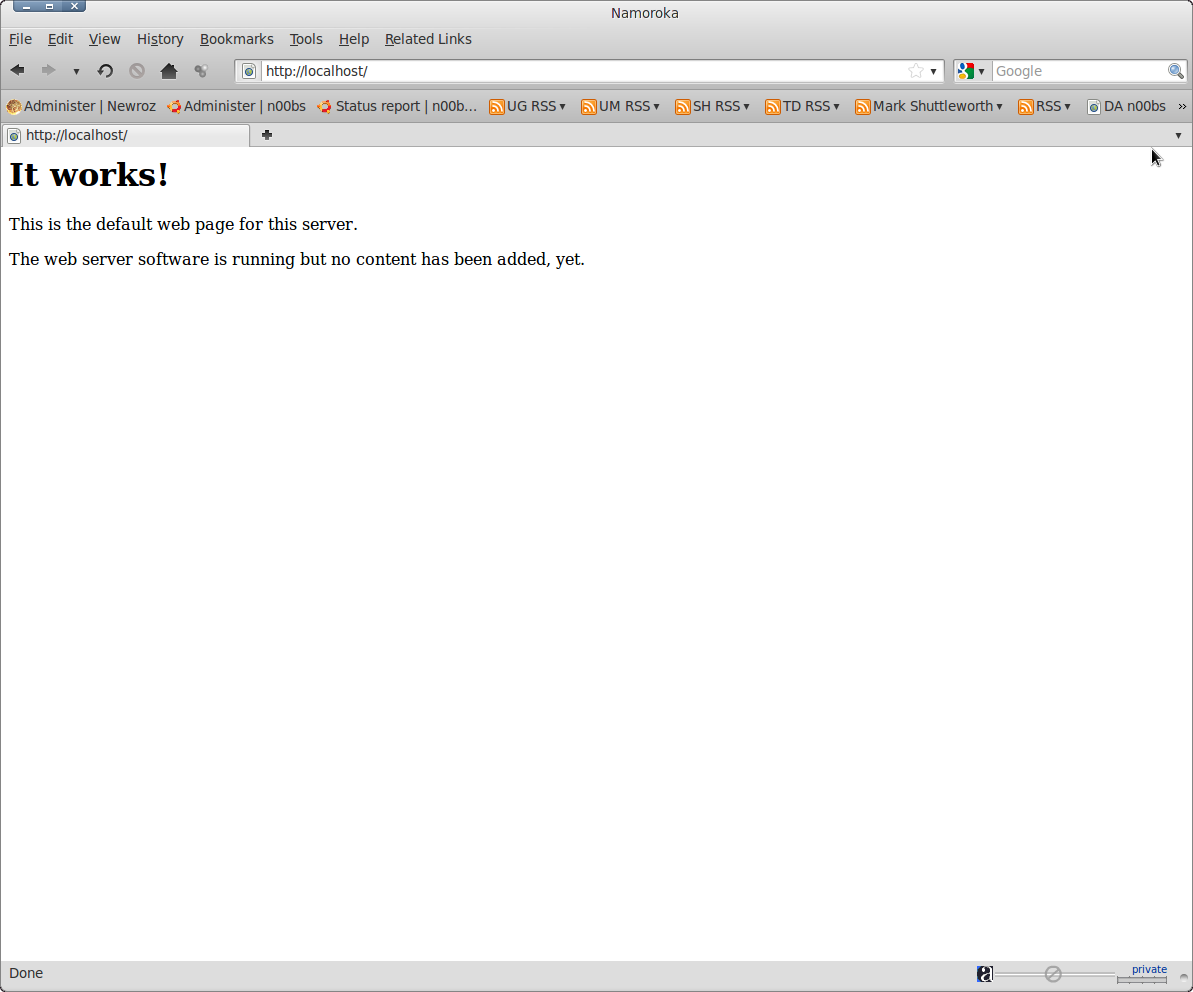
You should see a page in your browser saying “It works!”
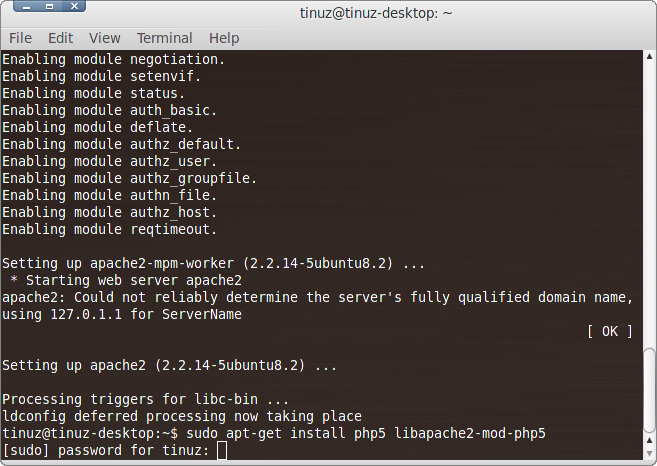
In the next part we will install PHP5, in your Terminal window copy+paste the following line:
sudo apt-get install php5 libapache2-mod-php5
The Terminal will then ask you for you’re password, type it and then press enter.
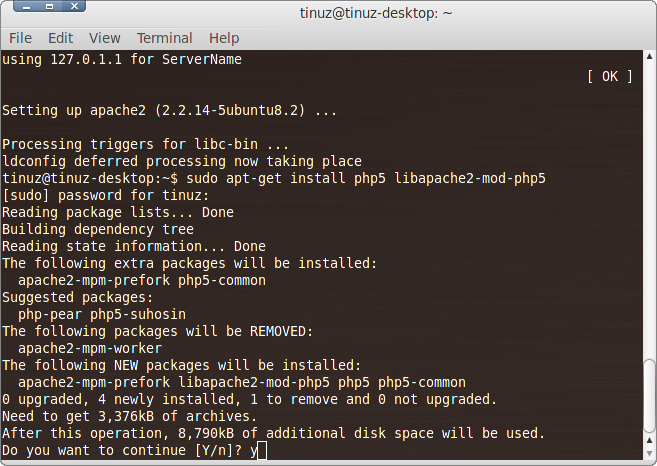
Press y key and press Enter
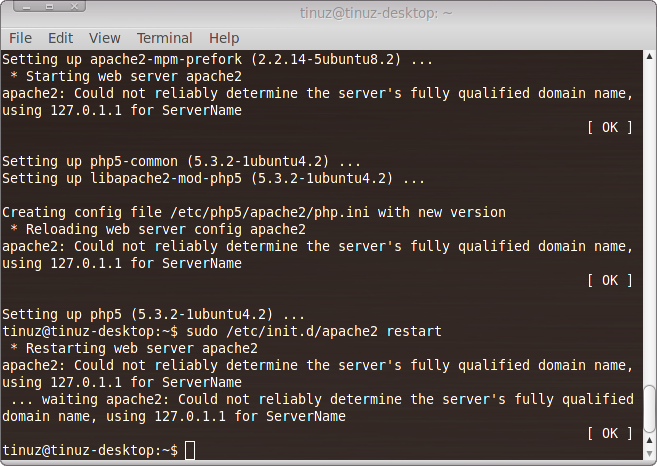
In order for PHP to work and be compatible with Apache we must restart it. In your Terminal window copy+paste the following line:
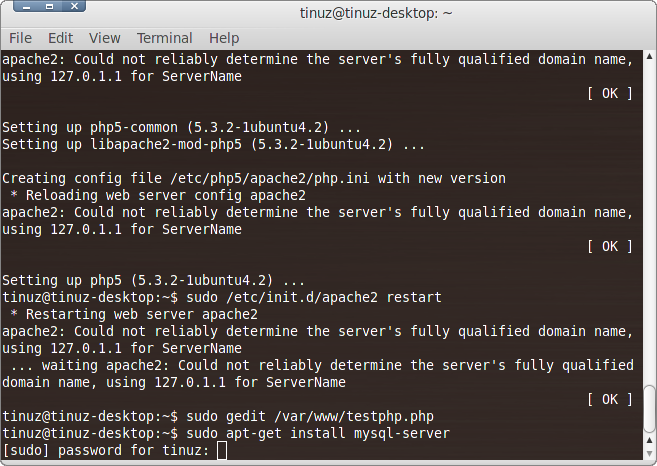
sudo /etc/init.d/apache2 restart
To ensure there are no issues with PHP5 let’s give it a test run…. in your Terminal window copy+paste the following line:
sudo gedit /var/www/testphp.php
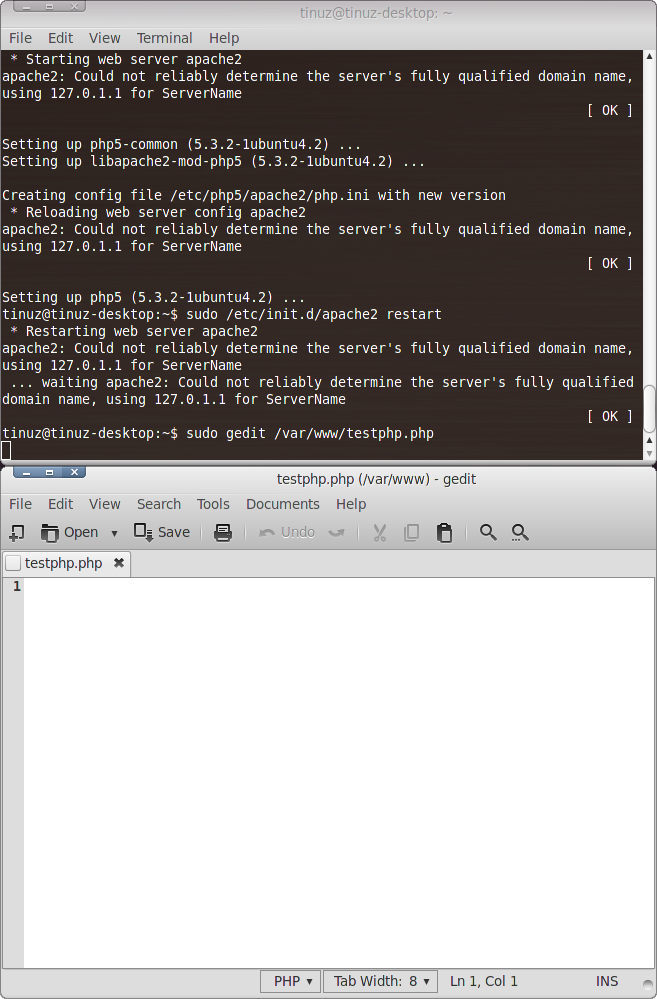
This will open up a file called phptest.php, copy+paste the following line into the phptest file:
<?php phpinfo(); ?>
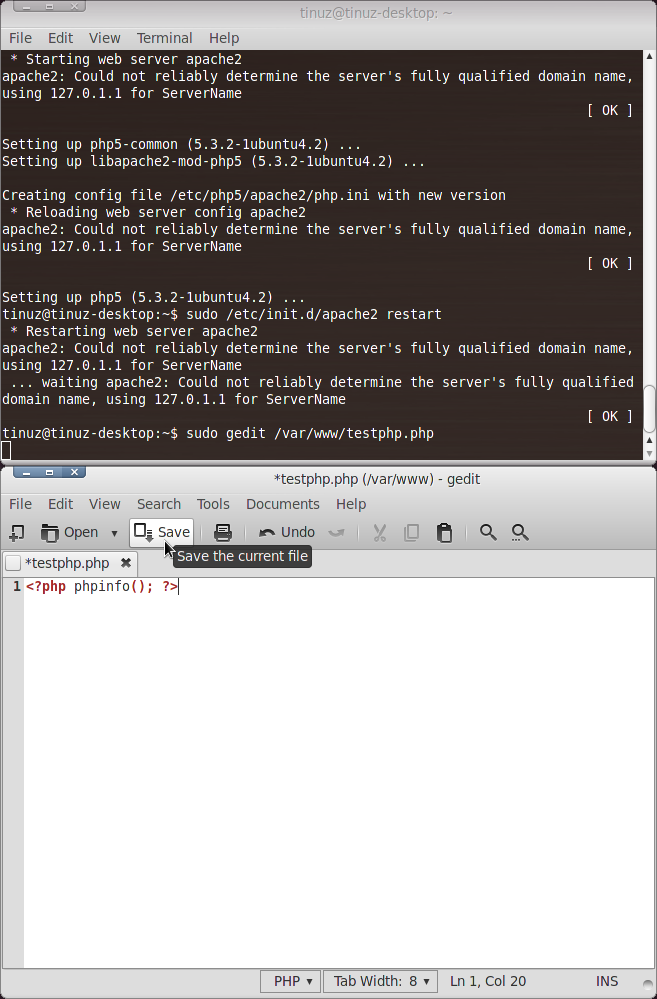
Save and close the file.
Now open you’re web browser and copy+paste the following into the web address:
http://localhost/testphp.php
The page should look like this:
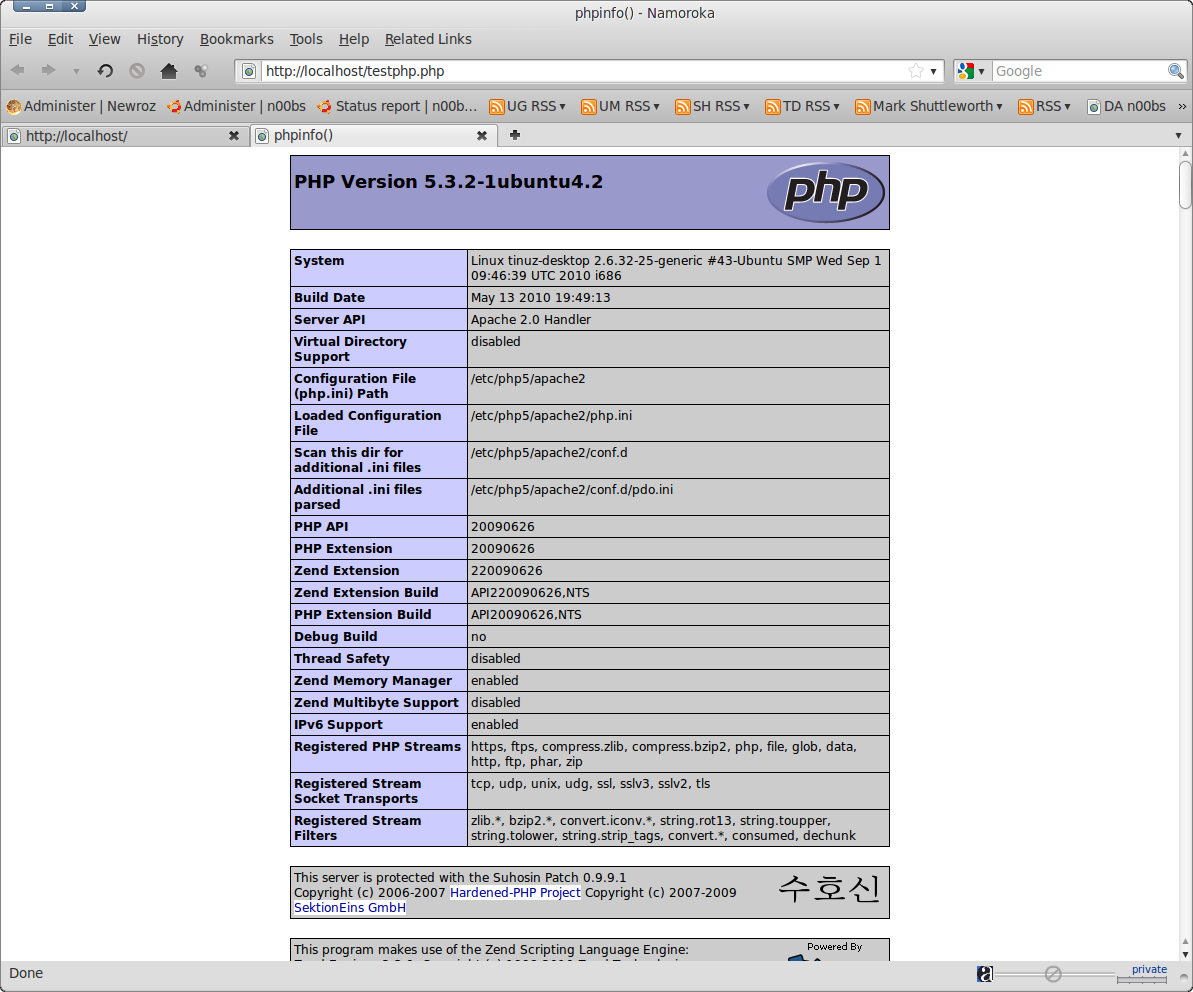
Congrats you have now installed Apache2 and PHP5!
To finish this guide we will install MySQL, to do this copy+paste the following line in your Terminal window:
sudo apt-get install mysql-server
The Terminal will then ask you for you’re password, type it and then press enter.

Press the y key and press Enter

Fill in a password and remember it 🙂
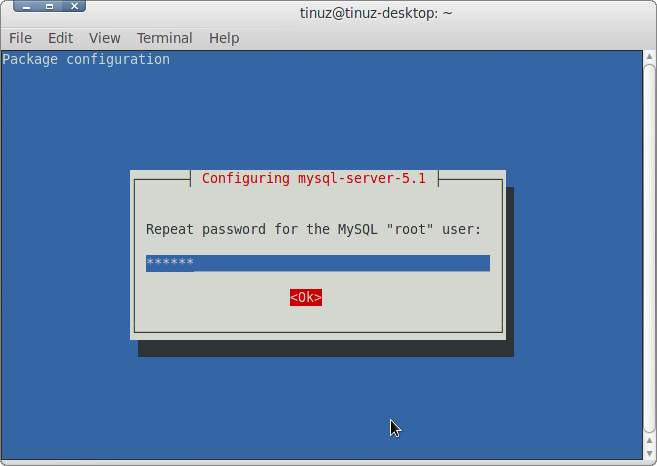
Repeat the password you used in the previous step
In order for other computers on your network to view the server you have created, you must first edit the “Bind Address”. Begin by opening up Terminal to edit the my.cnf file. to do this copy+paste the following line in your Terminal window:
gksudo gedit /etc/mysql/my.cnf
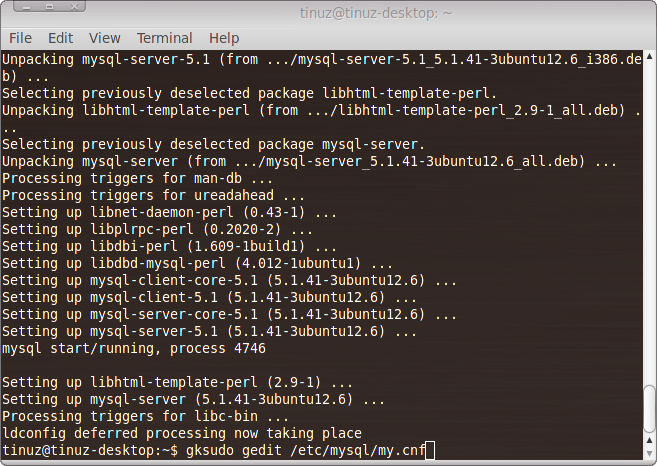
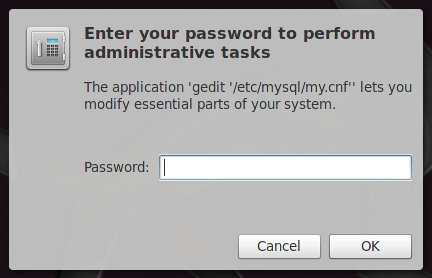
Fill in your password and click on the OK button
Now your my.cnf file will be opened

Scroll down to line 54 or the line that that says: bind-address = 127.0.0.1
Now change 127.0.0.1 to your IP address (my IP is 192.168.1.102 as you can see below)
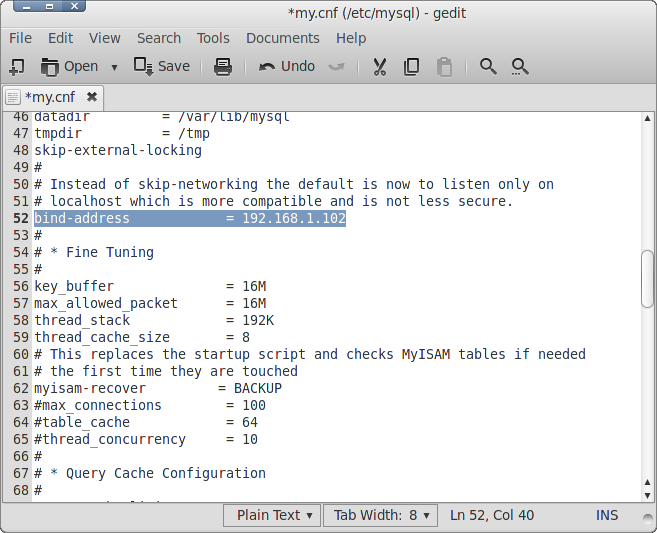
Now save and close the my.cnf file
In this last step we are going to install phpMyAdmin which is an easy tool to create and/or edit your databases. Copy+paste the following line into your Terminal window:
sudo apt-get install libapache2-mod-auth-mysql php5-mysql phpmyadmin
The Terminal will then ask you for you’re password, type it and then press enter.
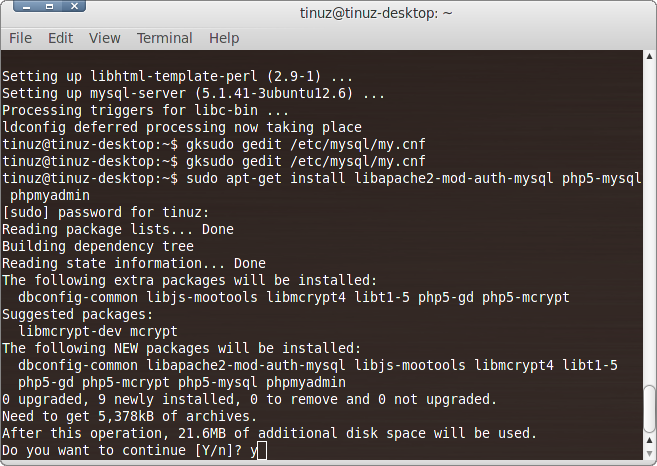
Press the y key and press Enter
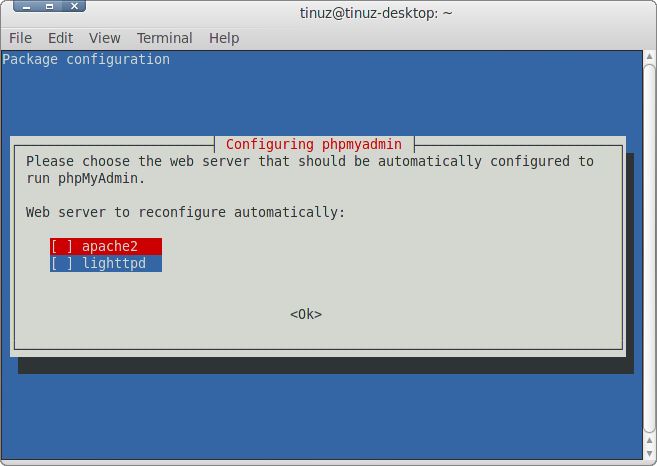
Select apache2 and press Enter
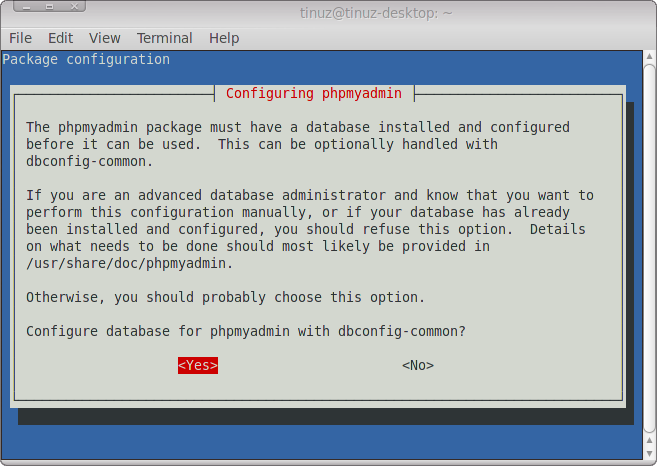
Select Yes and press Enter
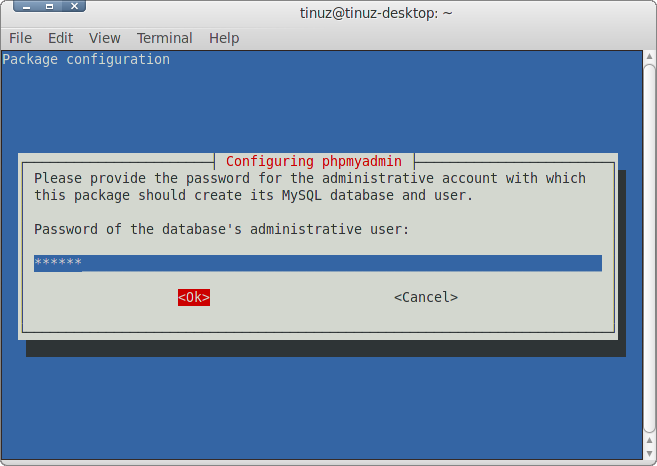
Enter the same password you used for installing MySQL
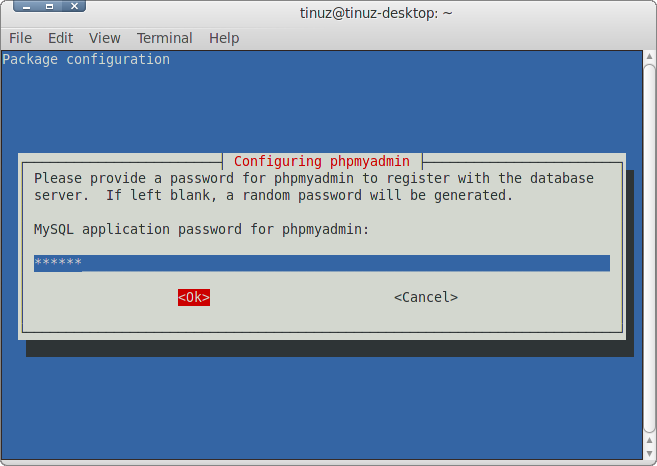
Fill in the same password as in the previous step
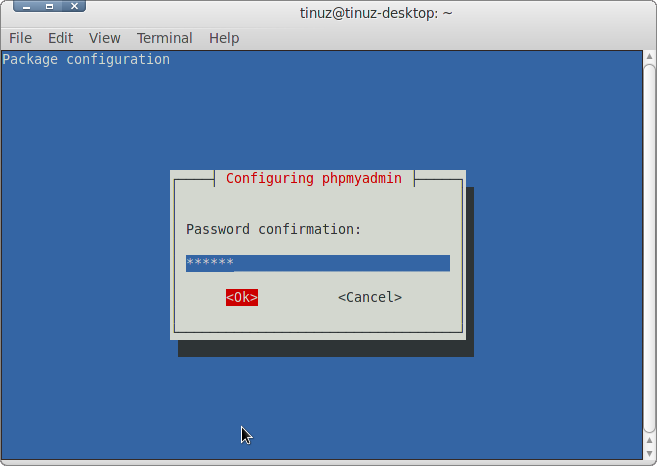
Confirm the password
Now you are done all we have to do now is restart Apache, in your Terminal window copy+paste the following line:
sudo /etc/init.d/apache2 restart
To create a database open your web browser and enter the following url:
http://localhost/phpmyadmin/
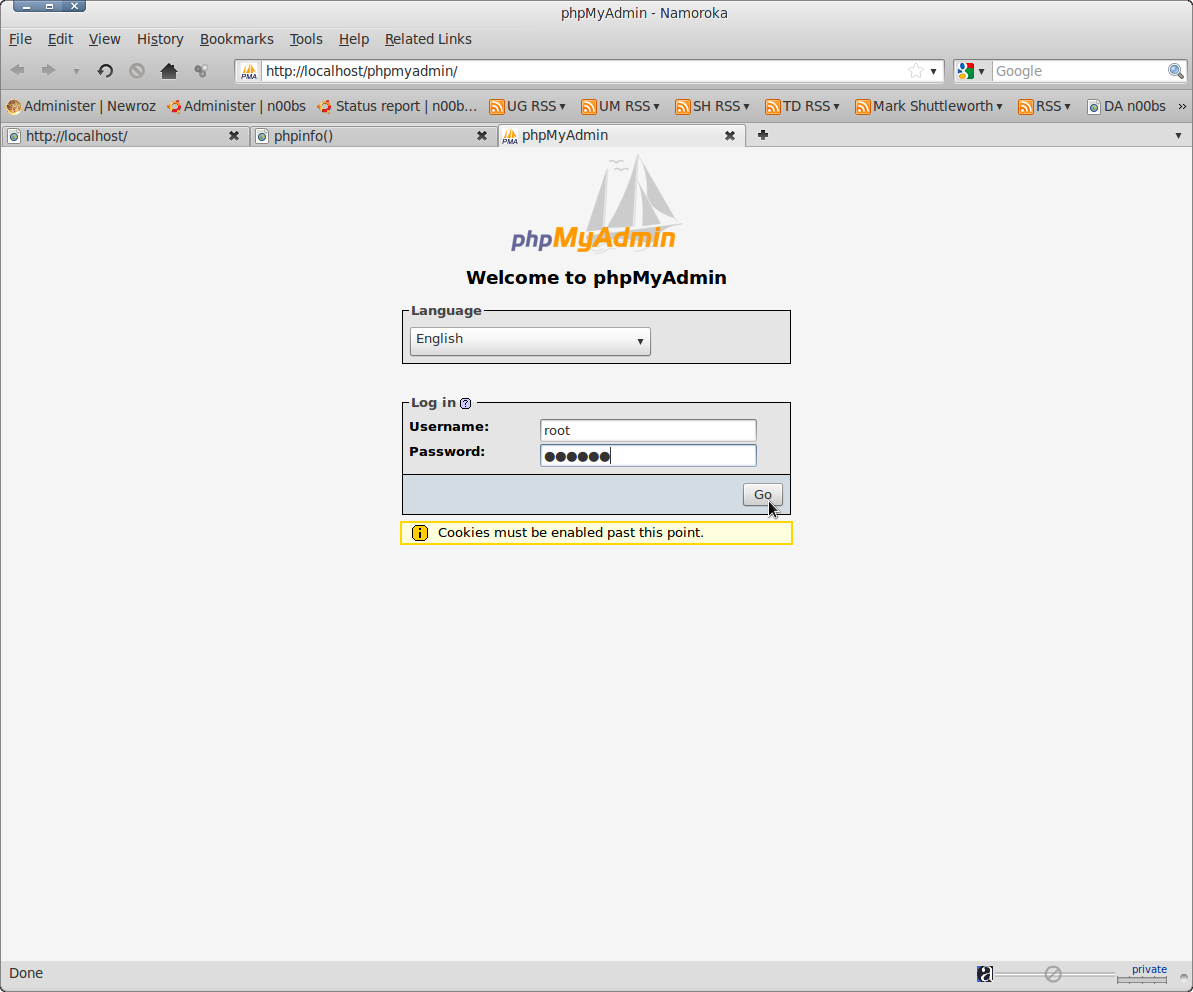
Username is root and at password fill in the password you used during installation
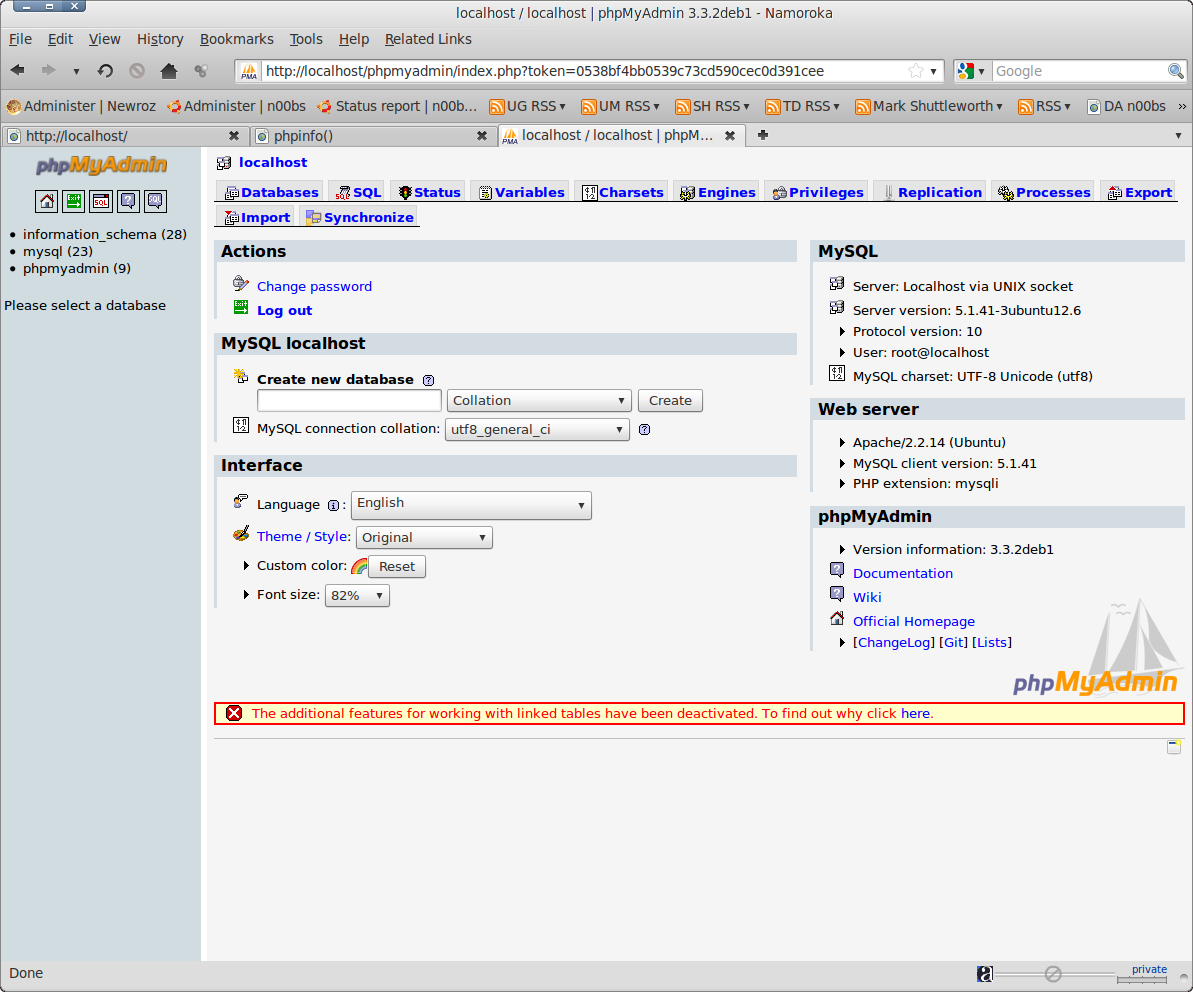
Now you can create or change a database
awsm post man…really helped
thank you for this. i have never setup up a server from scratch on my own. back where i used to work the server admin used to handle this. i followed your post step by step and everything went perfectly smooth
thank you very much =)
Great post/article.
A complete LAMP stack from zero to 100% in few minutes.
keep the good working on
url http://localhost/phpmyadmin/ gives me error NOT FOUND.
copy+paste the following lines in the terminal window:
And try again.
good lucid explained and it is helpful, great job done by you all there